Category
- 2 Bolt Flange Bearing (20)
- 3 Bolt Flange Bearing (9)
- 4 Bolt Flange Bearing (23)
- Flange Mount Bearing (122)
- Pillow Block Bearing (13)
- Spherical Plain Bearing (14)
- Spherical Rod Ends (5)
- Plummer Block (5)
- Agricultural Bearings (7)
- Ball Bearings (7)
- Tapered Roller Bearing (2)
- Automotive Bearing (1)
- Bearing Accessories (19)
Hot Sale Bearings
-

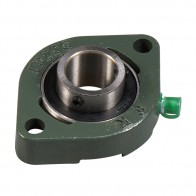
SBFW200 Series 2-bolt Flange Mounted...
Price: US $0.8-25 / Piece -

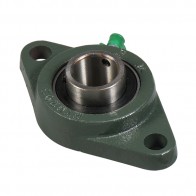
SAFTN200 Series Light Duty 2-Bolt Flange...
Price: US $0.8-25 / Piece -

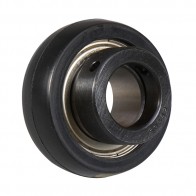
RCSM200 Series Rubber Mounted Cartridge...
Price: US $0.8-25 / Piece -

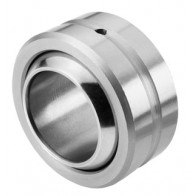
GEES-2RS Series Spherical Plain Bearing
Price: US $1-30 / Piece
ACCURACY OF BALL BEARING UNITS
ACCURACY OF BALL BEARING UNITS
1. Radial Internal Clearance of Bearings
The radial internal clearance of the
bearing for the unit is same with the reference value of JIS B 1520 deep-groove
ball bearings. Generally, the normal clearance is adopted for cylindrical bore
bearings and C3 clearance which is a little greater is adopted for tapered bore
bearings. When the environmental temperature is very high or when the
temperature difference between the outer and inner rings is large, a larger
clearance must be adopted because the clearance decreases due to thermal
expansion of the bearings materials and temperature gradient in the bearing.
1.1 Cylindrical bore bearings
Unit=0.001mm
|
Bore diameter |
C2 |
N |
C3 |
C4 |
|||||
|
over |
incl. |
min. |
max. |
min. |
max. |
min. |
max. |
min. |
max. |
|
10 |
18 |
3 |
18 |
11 |
25 |
18 |
33 |
25 |
45 |
|
18 |
24 |
5 |
20 |
13 |
28 |
20 |
36 |
28 |
48 |
|
24 |
30 |
5 |
20 |
13 |
28 |
23 |
41 |
30 |
53 |
|
30 |
40 |
6 |
20 |
15 |
33 |
28 |
46 |
40 |
64 |
|
40 |
50 |
6 |
23 |
18 |
36 |
30 |
51 |
45 |
73 |
|
50 |
65 |
8 |
28 |
23 |
43 |
38 |
61 |
55 |
90 |
|
65 |
80 |
10 |
30 |
25 |
51 |
46 |
71 |
65 |
105 |
|
80 |
100 |
12 |
36 |
30 |
58 |
53 |
84 |
75 |
120 |
|
100 |
120 |
15 |
41 |
36 |
66 |
61 |
97 |
90 |
140 |
|
120 |
140 |
18 |
48 |
41 |
81 |
71 |
114 |
105 |
160 |
1.2 Tapered bore bearings Unit=0.001mm
|
Bore diameter |
C2 |
N |
C3 |
||||
|
over |
incl. |
min. |
max. |
min. |
max. |
min. |
max. |
|
10 |
18 |
10 |
25 |
18 |
33 |
25 |
45 |
|
18 |
24 |
12 |
28 |
20 |
36 |
28 |
48 |
|
24 |
30 |
12 |
28 |
23 |
41 |
30 |
53 |
|
30 |
40 |
13 |
33 |
28 |
46 |
40 |
64 |
|
40 |
50 |
14 |
36 |
30 |
51 |
45 |
73 |
|
50 |
65 |
18 |
43 |
38 |
61 |
55 |
90 |
|
65 |
80 |
20 |
51 |
46 |
71 |
65 |
105 |
|
80 |
100 |
24 |
58 |
53 |
84 |
75 |
120 |
|
100 |
120 |
28 |
66 |
61 |
97 |
90 |
140 |
|
120 |
140 |
33 |
81 |
71 |
114 |
105 |
160 |
2. Dimensional Accuracies of Bearings
The dimensional accuracy of RiccoTek Bearings follows the dimensional accuracy
prescribed in ISO/TC4/SC6 ball bearings for rolling bearing units.
2.1 Accuracies of outer ring Unit=0.001mm
|
D(mm) |
△Dmp |
Kea |
||
|
over |
incl. |
max. |
min. |
max. |
|
30 |
50 |
0 |
-11 |
20 |
|
50 |
80 |
0 |
-13 |
25 |
|
80 |
120 |
0 |
-15 |
35 |
|
120 |
150 |
0 |
-18 |
40 |
|
150 |
180 |
0 |
-25 |
45 |
|
180 |
250 |
0 |
-30 |
50 |
|
250 |
315 |
0 |
-35 |
60 |
D---------------outside diameter of bearing.
△Dmp-------deviation of mean outside diameter Kea-------------radial run out of outer ring.
2.2 Accuracies of inner ring
|
d(mm) |
Cylindrical bore bearing |
Kia |
||||||||
|
Bore diameter |
△Bs,Cs |
|||||||||
|
UC,HC,SA,SB,SER |
SC |
△Bs,Cs |
||||||||
|
△dmp |
Vdp |
△dmp |
Vdp |
|||||||
|
over |
Incl. |
Max. |
Min. |
Max. |
Max. |
Min. |
Max. |
Min. |
Min. |
Max. |
|
10 |
18 |
+15 |
0 |
10 |
0 |
-8 |
6 |
0 |
-120 |
15 |
|
18 |
30 |
+18 |
0 |
12 |
0 |
-10 |
8 |
0 |
-120 |
18 |
|
30 |
50 |
+21 |
0 |
14 |
0 |
-12 |
9 |
0 |
-120 |
20 |
|
50 |
80 |
+24 |
0 |
16 |
0 |
-15 |
11 |
0 |
-150 |
25 |
|
80 |
120 |
+28 |
0 |
19 |
- |
- |
- |
0 |
-200 |
30 |
|
120 |
180 |
+33 |
0 |
22 |
- |
- |
- |
0 |
-250 |
35 |
d----------------bore diameter
△dmp--------deviation of mean bearing
bore diameter in a single plane.
Vdp-------------variation of bearing bore diameter in a single radial plane.
△Bs------------deviation of a single
inner ring width.
Cs-------------deviation of a single outer ring width.
Kia-----------------radial run out of inner ring.
2.3 Accuracies of tapered bore
|
mm |
△dmp |
△d1mp-△dmp |
Vdp1) |
|||
|
over |
incl |
max. |
min. |
max. |
min. |
max. |
|
18 |
30 |
+33 |
0 |
+21 |
0 |
13 |
|
30 |
50 |
+39 |
0 |
+25 |
0 |
15 |
|
50 |
80 |
+46 |
0 |
+30 |
0 |
19 |
|
80 |
120 |
+54 |
0 |
+35 |
0 |
25 |
|
120 |
180 |
+63 |
0 |
+40 |
0 |
31 |
1).Applies in any single radial plane of
the bore.
d--------bore diameter
d1-------diameter at the theoretical large end of a basically tapered bore
d1-d+1/12B
△dmp----deviation of mean bore diameter
in a single plane(for a basically bore, dmp refers to the theoretical small end
of the bore).
△d1mp-----deviation of mean bore diameter
in a single plane at the theoretical large end of a basically tapered bore.
Vdp-----variation on bore diameter in a single radial plane.
B--------inner ring width
Tolerance in distance n from center line of
spherical outer ring to side of inner ring
Unit=0.001mm
|
Dimensions of bore diameter d(mm) |
Tolerance of n |
|
|
Over |
Incl. |
|
|
- |
50 |
+/-200 |
|
50 |
80 |
+/-250 |
|
80 |
120 |
+/-300 |
|
120 |
- |
+/-350 |
Tolerance of spherical bore diameter of housings Unit=0.001mm
|
Dimension of spherical bore diameter D.(mm) |
Housing for loose fit |
Housing for sliding fit |
Housing for sliding fit |
||||||||||
|
Symbol H |
Symbol J |
Symbol K |
|||||||||||
|
D1m |
D1 |
D1m |
D1 |
D1m |
D1 |
||||||||
|
Over |
Incl. |
Max. |
Min. |
Max. |
Min. |
Max. |
Min. |
Max. |
Min. |
Max. |
Min. |
Max. |
Min. |
|
30 |
50 |
+25 |
0 |
+30 |
-5 |
+14 |
-11 |
+19 |
-16 |
+7 |
-18 |
+12 |
-23 |
|
50 |
80 |
+30 |
0 |
+36 |
-6 |
+18 |
-12 |
+24 |
-18 |
+9 |
-21 |
+15 |
-27 |
|
80 |
120 |
+35 |
0 |
+42 |
-7 |
+22 |
-13 |
+29 |
-20 |
+10 |
-25 |
+17 |
-32 |
|
120 |
180 |
+40 |
0 |
+48 |
-8 |
+26 |
-14 |
+34 |
-22 |
+12 |
-28 |
+20 |
-36 |
|
180 |
250 |
+46 |
0 |
+55 |
-9 |
+30 |
-16 |
+39 |
-25 |
+13 |
-33 |
+22 |
-42 |
|
250 |
315 |
+52 |
0 |
+62 |
-10 |
+36 |
-16 |
+46 |
-26 |
+16 |
-36 |
+26 |
-46 |
Notes:
a).D1m is given by the following equation, where D1max and D1min in the
equation are maximum and minimum values measured respectively. D1m=
D1max+ D1 min /2
b). Dimensional tolerance for spherical inside of housings are divided into
loose fit H, sliding fit J and sliding fit K.
c). When the contained bearing are equipped with locking-pins, loose fit is
applied.
Tolerance of castings.
Dimensional accuracies of casting follow JIS B 0407 [Permissible deviations in
dimensions without tolerance indication for iron castings] medium class
accuracy. Unit=mm
|
Tolerance in length |
Tolerance in thickness |
||||
|
Dimensions |
Tolerance |
Dimensions |
Tolerance |
||
|
over |
Incl. |
over |
Incl. |
||
|
- |
120 |
±1.5 |
- |
- |
- |
|
120 |
250 |
±2.0 |
- |
10 |
±1.5 |
|
250 |
400 |
±3.0 |
10 |
18 |
±2.0 |
|
400 |
800 |
±4.0 |
18 |
30 |
±3.0 |
|
800 |
1600 |
±6.0 |
30 |
50 |
±3.5 |
Want to know more about visit here: Flange Mount Bearing


